My favorite time of the year has arrived and my Christmas tree is already up – I have been thinking of the Christmas Eve menu already, planning the food and the drinks. However, unlike previous years, I don’t think I will be able to have my oh, so beloved Christmas series here on the blog – too much work, other priorities at the moment.
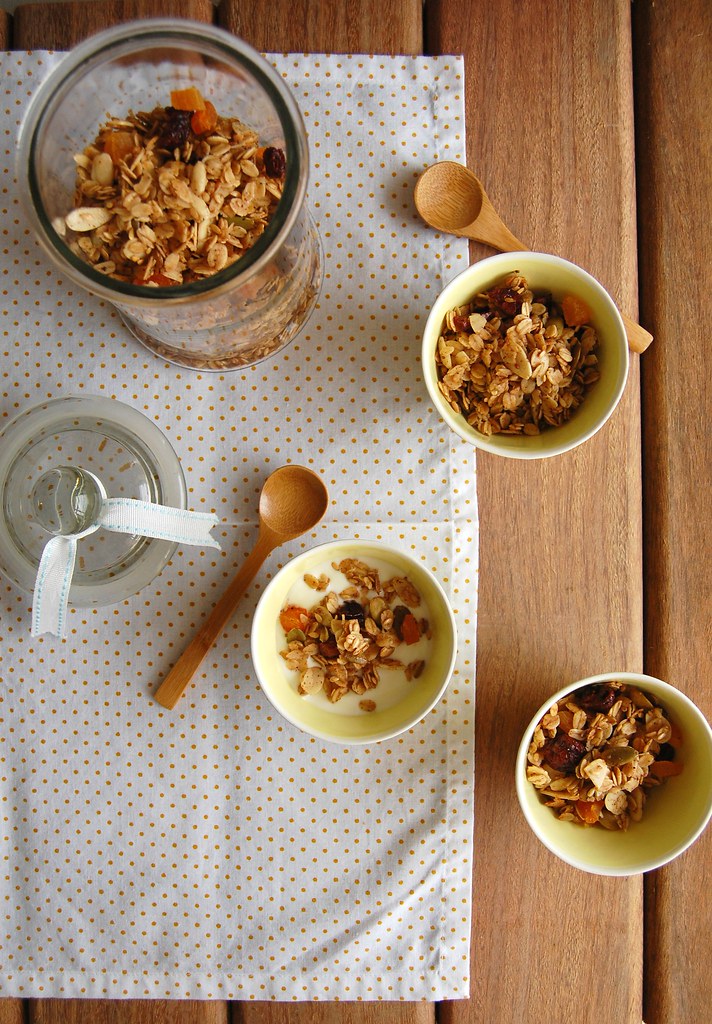
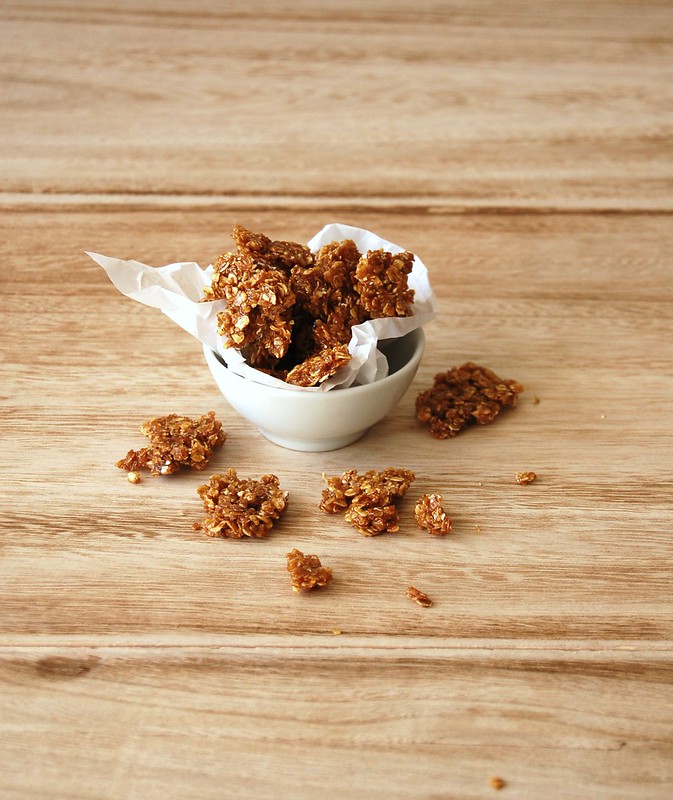
Having said that, I felt I had to bring you at least one recipe with a holiday touch and it is my gingerbread granola: filled with spices it will make your house smell like Christmas immediately.
Even if I am not able to bring you other holiday recipes aside from this granola, there is plenty of inspiration from previous years: it is just a matter of clicking on the Christmas tag here on the blog.
Gingerbread granola
own recipe
2 ½ cups (225g) rolled oats
¼ cup (40g) golden flaxseeds
¼ cup (35g) raw pumpkin seeds
½ cup (60g) flaked almonds
pinch of table salt
½ teaspoon freshly ground allspice
1 teaspoon ground cinnamon
1/8 teaspoon ground cloves
¼ teaspoon freshly ground nutmeg
½ teaspoon ground ginger
3 tablespoons canola oil
1/3 cup (80ml) agave or honey
½ teaspoon vanilla extract
½ cup (75g) dried cranberries, chopped in half if too large
½ cup (90g) dried apricots, diced
Preheat the oven to 180°C/350°F. Line a large baking sheet with foil.
In a large bowl, mix together the oats, flaxseeds, pumpkin seeds, almonds and salt. Set aside.
In a small bowl, whisk together the spices, oil, agave/honey and vanilla. Pour over dry ingredients and stir well to coat. Spread mixture over foil and bake for 10 minutes. Stir the granola around and bake for another 10 minutes – the granola will still be soft and will get crunchy once cooled. Remove from the oven and stir in the dried fruit. Let cool completely. Store in an airtight container at room temperature for up to 2 weeks.
Serves 6-8
Thursday, November 30, 2017
Gingerbread granola
Tuesday, November 28, 2017
Lime nutmeg snickerdoodles and Christmas gifts
This is the time of the year when my colleagues and friends with kids tell me that they have to buy Christmas gifts for their children’s teachers, and since the kids have so many teachers these days they have to buy tons of presents. This is when I suggest them to make cookies or brownies, to wrap them up beautifully and there, gifts are ready. :)
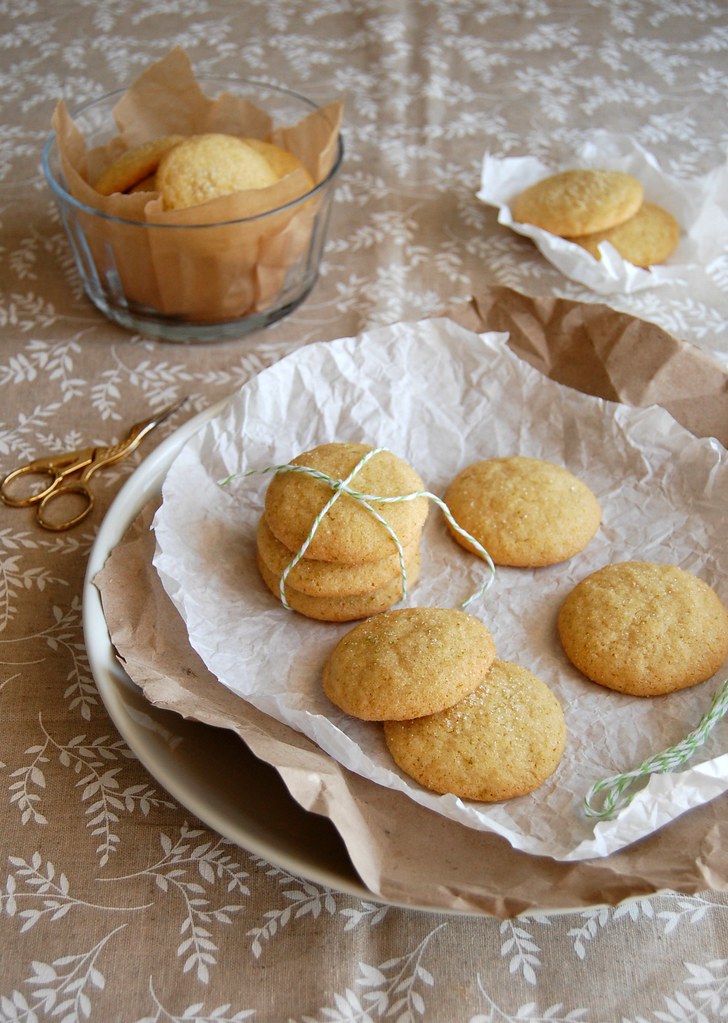
These snickerdoodles may be a good idea for a holiday gift: starting with a traditional snickerdoodle recipe, I swapped the baking soda and cream of tartar for baking powder – since not everyone has cream of tartar around or wants to buy it – and added a touch of lime and nutmeg (instead of the most common cinnamon). The cookies turned out delicious and they smelled amazing while in the oven – you might have to bake an extra batch for your neighbors. :)
Lime nutmeg snickerdoodles
own recipe
Dough:
1 ½ cups (210g) all purpose flour
1 teaspoon baking powder
1/8 teaspoon table salt
¾ cup (150g) granulated sugar
finely grated zest of 2 limes
½ cup (1 stick/113g) unsalted butter, room temperature
1 large egg, room temperature
½ teaspoon vanilla extract
To roll the cookies:
¼ cup (50g) granulated sugar
finely grated zest of 1 lime
¼ teaspoon freshly ground nutmeg
In a medium bowl, whisk together the flour, baking powder and salt. Set aside.
In the bowl of an electric mixer, rub sugar and lime zest together with your fingertips until sugar is fragrant. Add the butter and beat until creamy and light – scrape the sides of the bowl occasionally throughout the making of the recipe. Beat in the egg and the vanilla. Add the dry ingredients at once and mix on slow only until a dough forms. Cover with plastic wrap and refrigerate for 30 minutes – in the meantime, preheat the oven to 180°C/350°F and line two large baking sheets with baking paper.
To roll the cookies: in a small bowl, rub sugar and lime zest together with your fingertips until sugar is fragrant. Stir in the nutmeg. Roll 2 leveled teaspoons of dough per cookie into balls and then roll the balls through the sugar. Place onto prepared sheets, 5cm (2in) apart. Bake for 10-12 minutes or until cookies are golden around the edges. Cool on the sheets for 5 minutes, then slide the paper with the cookies onto a wire rack to cool completely.
Makes about 35
Thursday, November 23, 2017
Gorgonzola and fresh oregano grissini
At home we like nibbling very much, especially on weekends, and that came to my mind as I set up a plate of bread, cheese and fruit last Saturday for dinner: a glass of wine and the meal was perfect.
Sometimes we have guacamole with homemade tortillas, and of course there are days I don’t even want to enter the kitchen: those are the days for pizza. :)
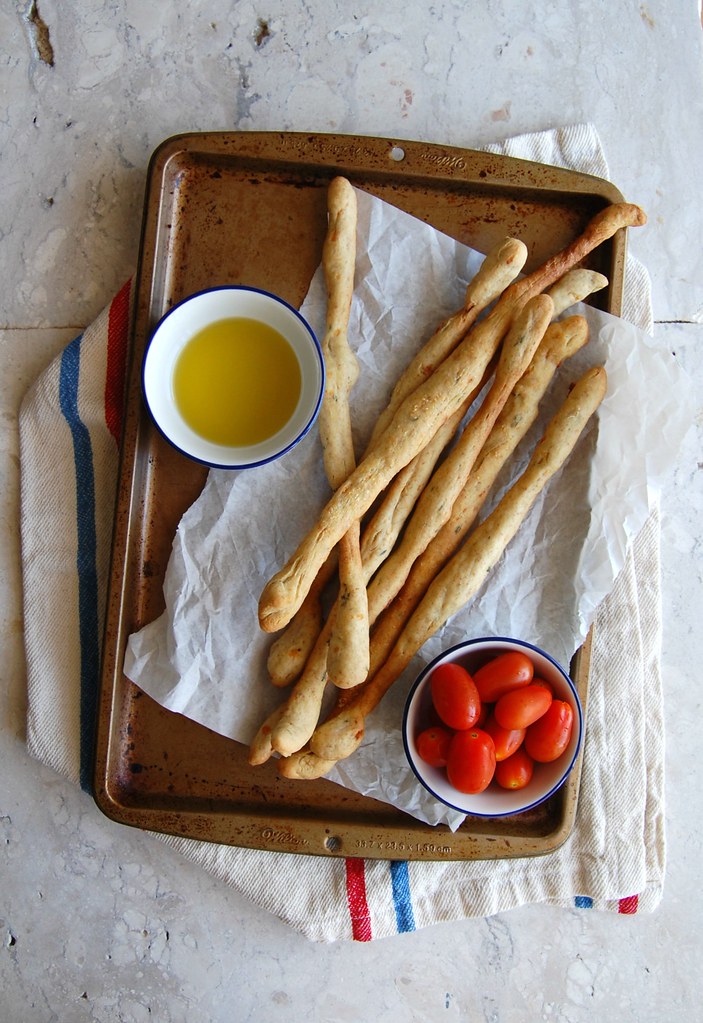
If you are feeling a bit more enthusiastic than me lately please have a go at these grissini: they are absolutely delicious and great for the cheese/fruit platter (and with wine, too). :)
Gorgonzola and fresh oregano grissini
own recipe
1 teaspoon dried yeast
1 teaspoon granulated sugar
200ml lukewarm water
2 cups (280g) all purpose flour
1/3 cup (46g) whole wheat flour
3 tablespoons olive oil + a bit extra for brushing
1 teaspoon table salt
2 tablespoons fresh oregano leaves, packed
50g gorgonzola, coarsely grated or crumbled if too soft
3 tablespoons finely grated parmesan
In the bowl of an electric mixer fitted with the dough hook, mix the yeast, sugar and water with a fork. Set aside for about 5 minutes or until foamy. Add the flours, olive oil and salt. Mix on medium for about 8 minutes or until mixture turns into an elastic and smooth dough – if mixing by hand, 10-12 minutes should do it. Mix in the oregano and the gorgonzola, shape the dough into a ball and transfer to a large bowl lightly brushed with olive oil. Cover with plastic wrap and set aside to prove for 1 ½ hours, or until doubled in size.
Preheat the oven to 200°C/400°F. Line two large baking sheets with foil and brush it with olive oil.
Punch the dough to remove the excess air. Divide dough in 24 equal portions e roll each of them into a 30cm (12in) sausage shape – if dough is too stick, lightly flour your counter, but avoid too much flour or the dough will be tough and dry. Place the grissini onto the foil leaving 2cm (little less then 1in) between them. Brush them with olive oil, sprinkle with parmesan and bake for 20-25 minutes or until golden brown.
Transfer the sheets to a wire rack and cool completely.
Makes 24
Thursday, November 16, 2017
Peanut butter panna cotta with oat praliné
Months ago, when the doctor told me I was lactose intolerant I felt quite sad: I immediately thought of my deep love for cheese and how that would impact my food habits. However, days after that, it hit me really hard: many of the desserts I love so much are cream based, not to mention the ice creams…
I felt miserable.
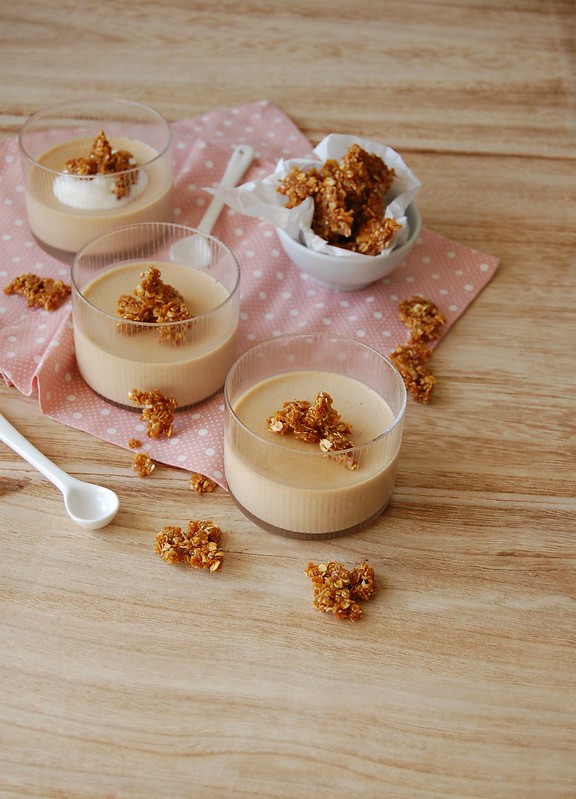
Now I have learned to deal with it and it is not as bad as I thought it would be: I can replace some of the ingredients with lactose free versions, plus I always have located pills in my purse – they are not foolproof, but it is indeed better than nothing. I have yet to try making a panna cotta with lactose free heavy cream, and I might start with the one I bring you today: it is absolutely delicious and one of my favorite recipes from the times I was working on recipes for the cookbook.
Peanut butter panna cotta with oat praliné
panna cotta: own recipe, oat praliné adapted from this book
Panna cotta:
½ tablespoon powdered unflavored gelatin
2 tablespoons cold water
½ cup (150g) smooth peanut butter
2 tablespoons demerara sugar – I used demerata to enhance the caramel flavor; can be replaced by granulated sugar
pinch of salt
1 teaspoon vanilla extract
1 cup (240ml) heavy cream
1/3 cup (80ml) whole milk
Oat praliné:
½ cup (45g) rolled oats
1/3 cup (67g) demerara sugar – I used demerara to enhance the caramel flavor; can be replaced by granulated sugar
Set aside four ½-cup capacity (120ml) glasses or ramekins.
In a small bowl, mix together the gelatin and water. Set aside.
In a medium bowl, whisk together the peanut butter, sugar, salt and vanilla. In a small saucepan, heat the heavy cream and milk together until they start to boil. Remove from the heat and pour over the gelatin, whisking well to dissolve it. Pour this over the peanut butter mixture and whisk well until smooth. Pass through a fine sieve and divide the liquid among the four glasses. Refrigerate until firm, about 3 hours – the panna cotta can be kept in the fridge for up to 2 days, just keep it covered with plastic wrap so it does not dry out.
Now, make the praliné: line a baking sheet with a piece of foil. Spread the sugar in a medium frying pan and cook over medium heat, without stirring. When sugar starts to melt and get golden around the edges, stir gently using a rubber spatula until all the sugar is melted. As soon as that happens, remove the pan from the heat and add the oats, stirring to cover it well with the caramel. Quickly pour the mixture on top of the foil and spread as much as possible, creating a thin layer. Set aside to cool completely. When it is time to serve the panna cotta, break the praline into smaller pieces and place on top of the the panna cotta – do not do this ahead of time for the moisture in the panna cotta can dissolve the caramel of the praliné.
Serves 4
Tuesday, November 14, 2017
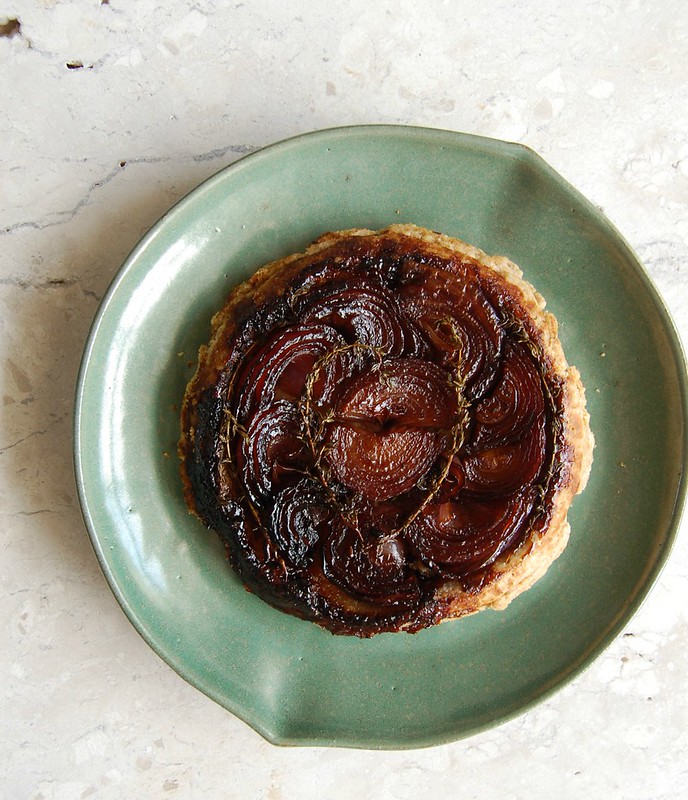
Red onion tarte tatin with rye pastry
I was never a pie/tart maker (one look at the blog index can confirm that), but I do love pies and tarts: I just don’t have much time for them, I guess. Two things that have helped me with this matter is making the pastry in one day and assembling and baking the pie on the other, or keeping an extra batch of pastry in the freezer – nothing like having the pastry ready when you find beautiful veggies or fruits in the market: lunch, dinner or dessert are halfway there.
This pastry is delicious and flaky, very similar to the corn flour pastry I posted a while ago. The onions not only make the tarte tatin beautiful but also very flavorsome: the time in the stove top and then in the oven transform their acrid flavor into something sweet and mellow.
Red onion tarte tatin with rye pastry
own recipe
Pastry:
¾ cup (105g) all purpose flour
3 tablespoons (30g) fine rye flour
¼ teaspoon table salt
¼ cup unsalted butter, chilled and cubed
3 tablespoons sour cream, chilled*
1 tablespoon iced water
Filling:
2 red onions (approximately 250g/9oz in total)
2 tablespoons unsalted butter
½ teaspoon olive oil
5 fresh thyme sprigs
½ teaspoon demerara sugar
2 teaspoons balsamic vinegar
2 teaspoons dry red wine
salt and freshly ground black pepper
Start by making the pastry: in a food processor, pulse all purpose flour, rye flour and salt until well combined. Add the butter and pulse a few times until mixture resemble coarse breadcrumbs. Mix sour cream and water in a small bowl, then with the motor running, gradually add the mixture and process just until a dough forms. Form dough into a ball, wrap in plastic wrap and refrigerate for 1 hour.
20 minutes before the end of the resting time of the pastry, preheat the oven to 180°C/350°F and start prepping the onions: peel them and cut them in half lengthwise. Then slice the onions in to 1cm (roughly ½in) half-moons – if the slices are too thin they will melt in the oven. Set aside.
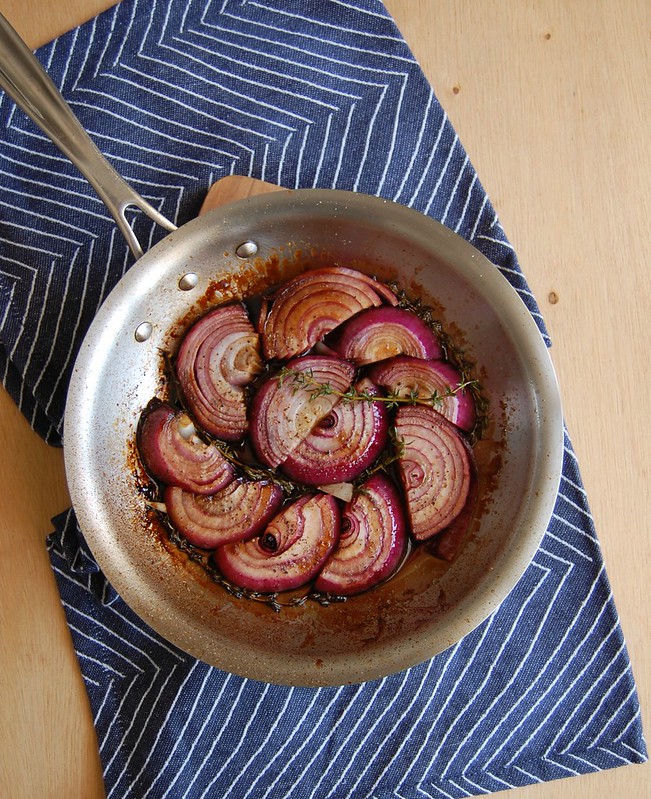
Heat a 22cm (9in) frying pan over medium heat – for this recipe you need a frying pan that can go into the oven. Add the butter and the olive oil, followed by the thyme sprigs – this way they will be on the top of the tart once you invert it. Remove the frying pan from the heat for one moment and arrange the onion slices on top of the thyme, placing the slices close together, for they will wilt slightly when cooked - cover the entire frying pan with the onion slices. Put the pan back on the heat and cook for 10 minutes, shaking the pan slightly instead of stirring the onions, to avoid them sticking to the bottom, but keeping them in place. Sprinkle with the sugar, drizzle with the balsamic vinegar and the wine, season with salt and pepper and cook for another minute. Turn off the heat and set aside.
Place the dough onto large piece of baking paper, cover with another piece of paper and roll into a rough 24cm (9in) circle – work fast in order to keep the pastry chilled. Peel off the paper from the top, then roll the pastry into the rolling pin, very gently, then unroll it on top of the onions (be careful since the pan will still be hot). Tuck the pastry in, make a small hole in the center of the pastry so the hot air can escape, then bake the tart for 30-35 minutes or until golden brown. Remove from the heat and very gently loosen the pastry from the edges of the pan. Top the pan with a plate and carefully unmold the tart – don’t worry if any onion bits get stuck in the pan, just loosen them up with a spatula and arrange them back on top of the tart. Serve with a green salad.
* homemade sour cream: to make 1 cup of sour cream, mix 1 cup (240ml) heavy cream with 2-3 teaspoons lemon juice in a bowl. Whisk until it starts to thicken. Cover with plastic wrap and leave at room temperature for 1 hour or until thicker (I usually leave mine on the counter overnight – except on very warm nights – and it turns out thick and silky in the following morning; refrigerate for a creamier texture)
Serves 4 with a green salad on the side
Tuesday, November 7, 2017
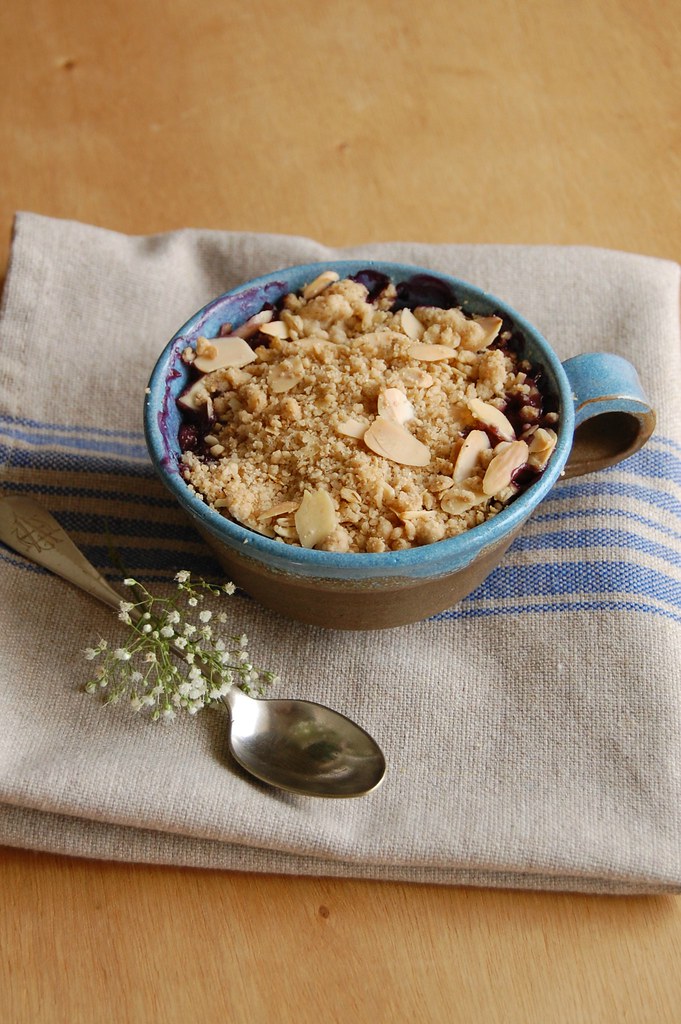
Banana and blueberry crumble
I do not mean to sound like a broken record (again), but things have been a bit slow on this blog and that usually happens when things are everything but slow on this side of the screen. Too much work, all sorts of other things going on… And on top of that I have had almost no energy to cook or bake, let alone photograph and type posts.
Many times in the past I read my favorite food bloggers write about burnout syndrome and I think that maybe the time has come for me, too: I don’t know for sure and my mind sometimes is a blur, to be honest. I have just come back from a wonderful trip to NYC in which I had fabulous food in all sorts of ways, and I thought this would give me inspiration to go back to the kitchen, but honestly, that has not kicked in yet.
Anyway, on a sweeter note: I have baked this crumble several times in the past year and a half and it has become one of my favorites, so here is the recipe.
Banana and blueberry crumble
own recipe
¾ cup + 2 tablespoons (125g) all purpose flour
¼ cup (50g) demerara sugar
¼ teaspoon baking poder
pinch of salt
¼ teaspoon ground cinnamon
3 tablespoons (42g) unsalted butter, chilled and cubed
¼ cup (22g) rolled oats
¼ cup (25g) flaked almonds
4 bananas, about 140g/5oz each
1 cup (120g) blueberries, fresh or frozen (unthawed)
Preheat the oven to 180°C/350°F. Set aside four 1-cup (240m) heatproof ramekins – if you prefer, bake the crumble in one 1-liter heatproof baking dish.
Crumble topping: in a medium bowl, whisk together the flour, sugar, baking powder, salt and cinnamon. Add the butter and rub the ingredients together with your fingertips until mixture resembles coarse meal. Using a fork, stir in the oats and almonds. Freeze the mixture for 5 minutes while you prepare the fruit.
Cut the banana in round slices and divide among the ramekins. Sprinkle with the blueberries. Cover the fruit with the crumble topping and bake for 25-30 minutes or until topping is golden and blueberries are bubbling. Serve warm with ice cream or heavy cream.
The crumble topping can be kept tightly sealed in a plastic bag in the freezer for 1 month – whenever you feel like having a crumble for dessert, sprinkle the mixture over the fruit of your choice and bake – do not unthaw before using.
Serves 4
